Sunday 13 July 2014

Dyeing a Phil and Ted Stroller


Shortly after finding out we were expecting our second child, we realized that we probably needed to finally invest in a stroller to get around. With our first, we got by very well carrying her in various baby backpacks/carriers. With the second, we figured it'd be easier logistically to just get a stroller. 
We loved the look of the Phil and Ted offerings but couldn't imagine spending £400 on a stroller. Luckily for us a used Phil and Ted Sport V2 came up for sale from a woman who didn't need it anymore. £60 later, we were proud Phil and Ted owners. 

While the "bones" of the stroller were good, the fabric was EXTREMELY faded. What once was I assume black was now this very unappealing blue/grey color that just screamed OLD. I looked at a lot of resources online in regard to reconditioning stroller fabric. I ultimately decided on dyeing the fabric. This posting will cover a few things:


1) Using a Phil and Ted Navigator sun hood on a Phil and Ted Sport V2
     -Navigator sunhood purchased from mother care for £30.
2) Removal of fabric from a Phil and Ted Sport V2
     Tools used: Philips screwdriver. a pair of pliers to remove stubborn bolts.
3) Dyeing of stroller fabric from a Phil and Ted Sport V2 Stroller
     Tools used: Fabric dye used: Jacquard iDye Poly x2 packets.  (iDye Poly purchased from Amazon). Instructions here: iDye for Polyester
                         A very large pot and electric hob.
4)Final result


First off, Here's what the purchased stroller looked like (without tandem seat installed).
Phil and Ted Sport V2 without tandem. Note how faded the fabric looks.
Fabric footwell. Very faded fabric.


The Phil and Ted Sport V2 sun hood is terrible compared to the newer models. When deployed, it rarely blocked  the sun from my daughter's eyes. 

Upper fabric covering the frame was covered by the sun hood(sun hood has been removed). Note how much darker it is than the rest of the fabric.
Another angle showing how faded the fabric got over the years. I'm thinking the previous owner kept it in their sunroom and it was blasted by sun for years.


1) Using a Phil and Ted Navigator sun hood on a Phil and Ted Sport V2

Phil and Teds Navigator hood purchased from mothercare for about £30.Pricey but well worth it.


Clipping the sunshade into place was a snap (literally). Through trial and error, I find the optimal position for the hood is attaching it to the part of the frame that bends centrally in either side. Another great feature is, since it clips on the frame, we regularly move it to the tandem seat to block the sun of the child sleeping there. We're seriously thinking of getting another one just for the tandem seat.

Phil and Ted Navigator sunhood on a Sport V2. It immediately improves the stroller's esthetics and blocks considerably more sun from the occupant. also helps show how faded the old fabric is.

Sunhood deployed. WAY MORE COVERAGE THAN THE OLD SUNHOOD.

My daughter is always in the shade now.


2) Removing of the fabric from a Phil and Ted Sport V2

I'm sure there are great videos online covering this, but just for completeness' sake, here's how to remove the fabric.

Use a pair of pliers to grab the fabric just superior to the grommet over the metal bolt and pull/out to release the grommet.
Bolt now resting above the released grommet/fabric.

Using a pair of pliers and a screwdriver, remove the bolts on either side.
Bolt removed from the frame, freeing up the handlebar.
Pull up firmly to remove handlebar
See those straps? Remove them by unscrewing the two attachment plates


With the fabric now slackened, release fabric tucked under frame and pull up from the frame to release the upper fabric.

Upper fabric removed next to handle bar

As for lower fabric, release front wheel by pulling pin behind the supporting strut. Unscrew attachment plates keeping footwell fabric on(I think six of them).

Four more attachment plates on back of fabric attaching it to plate. Remove them.

Lower fabric consisting of basket and foot well removed.

Back of the packet. The stroller fabric was originally black so I went with dyeing it black. I doubt dyeing it any other color would have worked.

Jacquard iDye Poly. I used two of these packets


Fabric dye and color enhancer added to a boiling pot of water. As large a pot as this was, there was no way it was going to fit all of the fabric. I therefore had to flip the fabric over after the instructed 60 minutes in a rolling boil. I also constantly agitated the fabric with a long-handled spoon. This was the lower fabric piece. It ALMOST fit in there, but not quite.

There was no way the upper fabric would fit in there. Same as above, I flipped the fabric and did another sixty minutes.  After both pieces were dye'd, I placed them out in the yard to cool. I then threw them in the washing machine with mild detergent to remove any remaining unbound dye. In hindsight I should have just hung them on a clothes line and hit them with a garden hose. In order to place the upper fabric piece in the washing machine, I had to remove the two battens. Placing them back into the fabric and keeping them in place has been an issue ever since.
Tandem fabric before dyeing


Tandem fabric after dyeing.

After the dyeing process, I placed all the dyed fabric in our washing machine and washed with mild detergent to remove any of the remaining dye. In hindsight, I would have just taken out back and hosed the fabric off really well. In order for the pieces to fit in our washing machine, I had to remove the batons from the main seat. It's been a pain trying to get the to stay in ever since.

Below is the final result of the dyeing process. Tandem seat and navigator hood (along with optional infant) are on the stroller. It looks like a brand new stroller. We've actually gotten compliments on how good it looks. It's also probably the most unique looking sport v2 around in that the dyeing process has darkened all the reflective strips and the red and white Phil and Teds emblem. 

Upcoming projects: making a handle bar cover and possibly buying another sunshade for the tandem seat.


Sunday 9 June 2013

Bike rack on a rover 200

Bike Rack on a Rover 200


I needed a bike rack to use on our Honda Accord sedan so I did some research and ended up with a Hollywood Racks Model Express 3 bike rack.  I then purchased a 1997 Rover 220 (bubble type) and hoped the bike carrier would work with it. Sure enough, it did and it's been great in carrying our two bikes (one with a child seat). You can see by the pics that it'd be pretty hard/impossible to have a third bike on the carrier with the other two bikes (mainly because one has a car seat on it).

Some general info:

Car: 1997 Rover 220
Rack: Hollywood Racks Express 3 bike rack
Bikes used: 22" Python Mountain bike, 18" Univega women's mountain bike
Child carrier used: Bell Cocoon deluxe 500 child carrier

Tools used:
 None. Just use your hands.


1. Out of the box, this is what it looks like:


2. For fitting on my Rover 220, I adjusted the rack frame so the frame forms less than a 90 degree angle. From the instruction manual:  loosen the black hubs by turning the hub adjustment 
knobs counter-clockwise. This will allow the two sections of the rack frame to move relative to one another
for correct rack placement on your vehicle.
The hubs unloosened.                                                              The hubs tightened so that the teeth lock.


Angle of rack ready to be placed.

Another pic.

3. Fitting on the car:  I started with the upper straps. The metal hooks slide into place over the hatch.


4.  I attached the side straps the corners of the hatch. Here's a picture of the left and right straps.


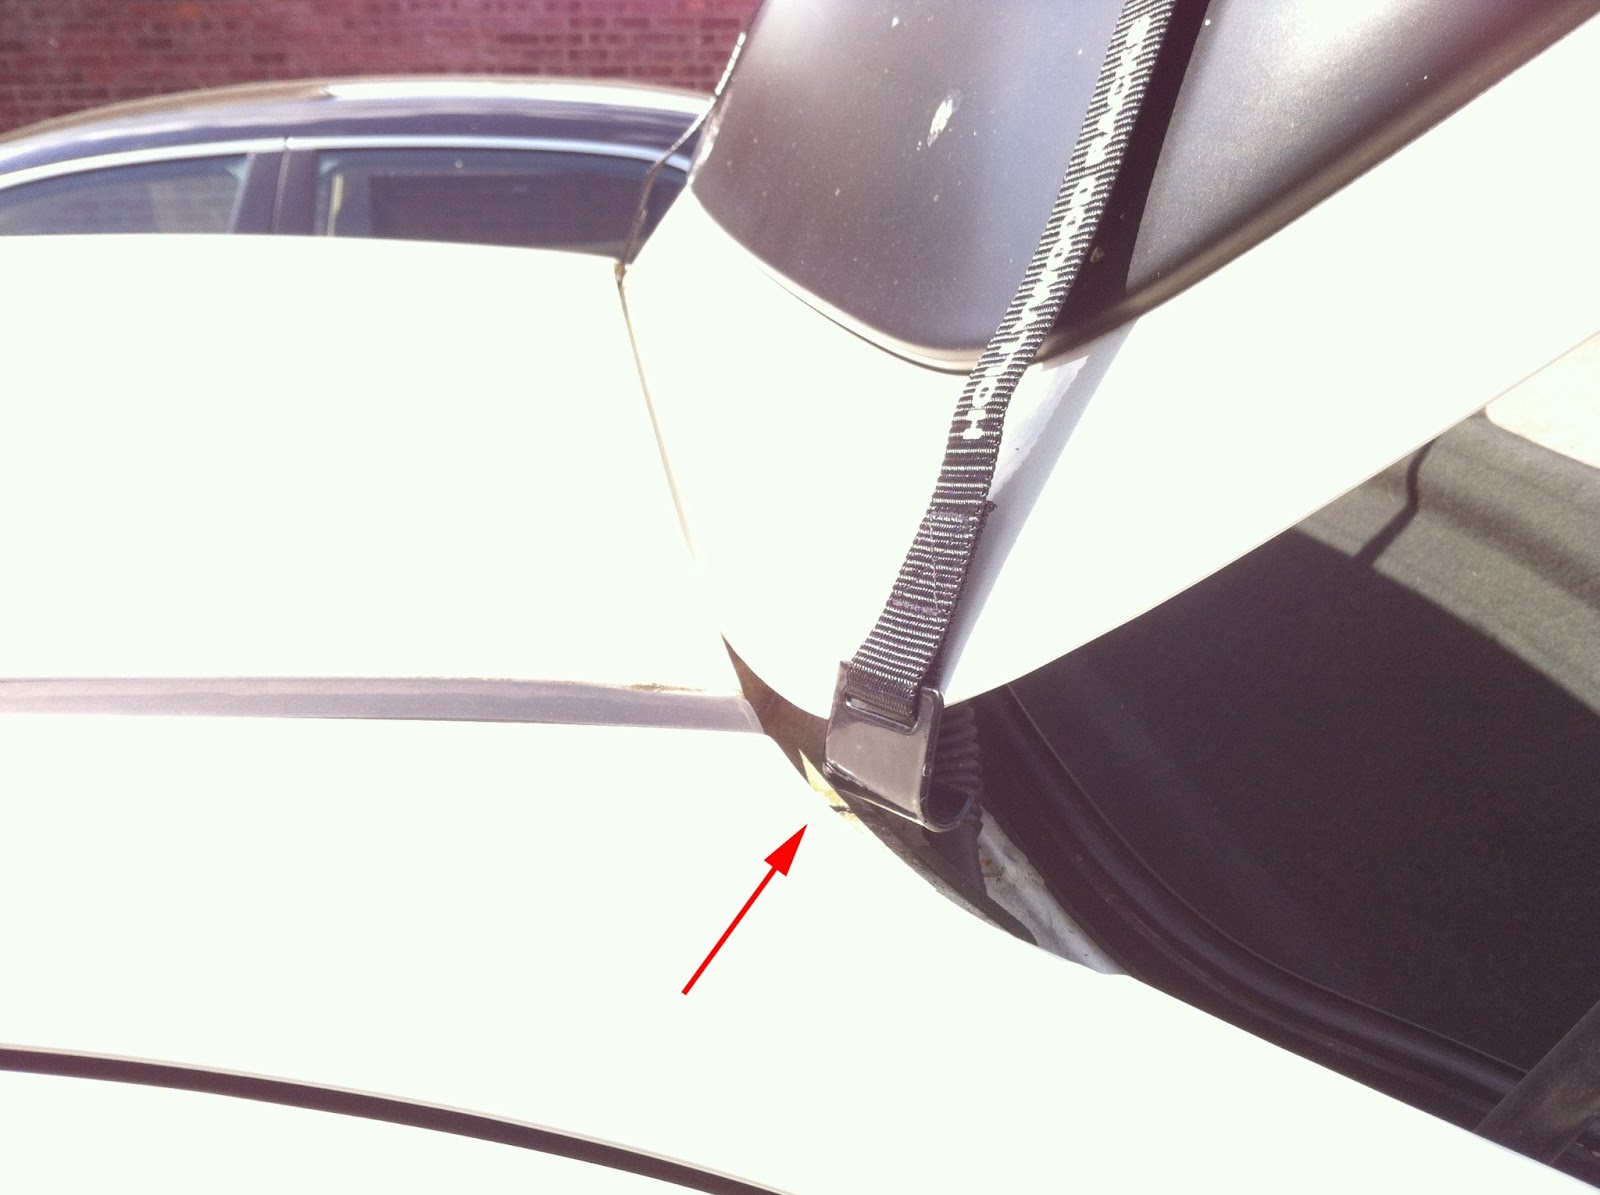
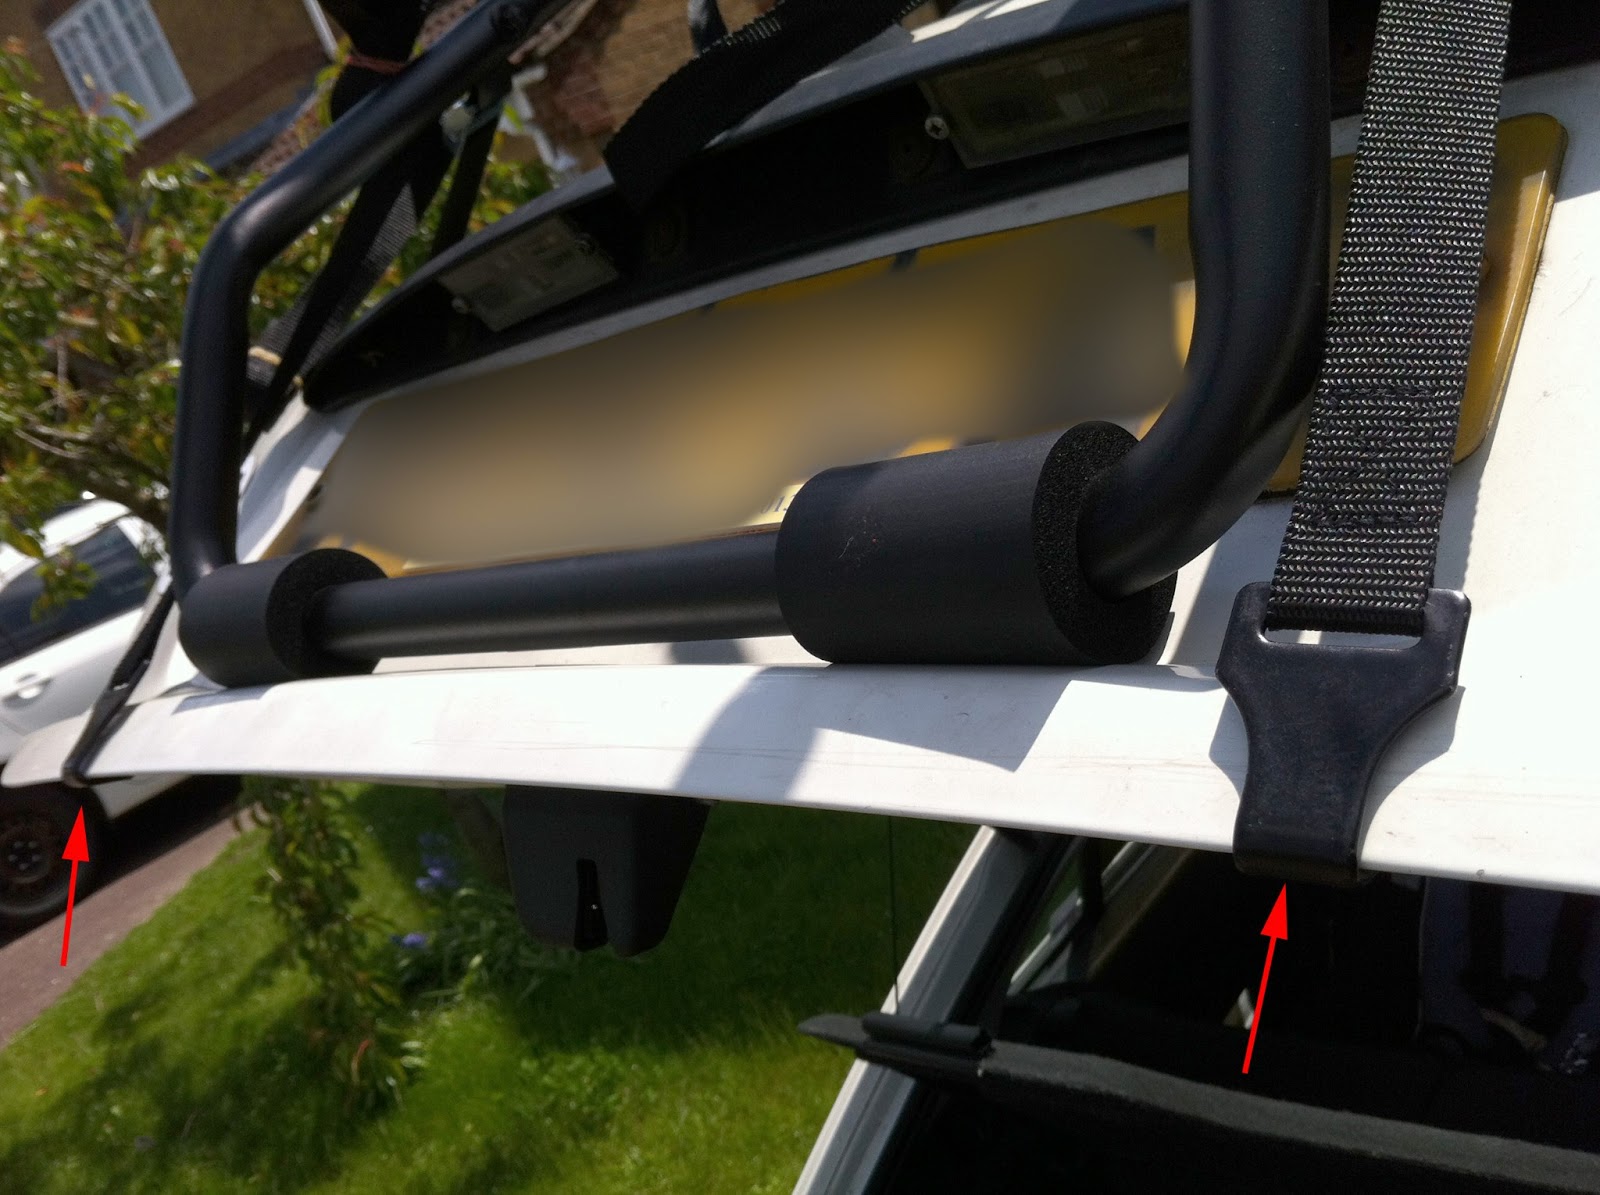
5. Finally, I attached the bottom straps.  Be sure to rest the bottom bracket on the lip of the license plate depression area. As mentioned in the manual, the rack needs to rest on the steel of the hatch/lid, NOT on the glass (unless you want to break your back window).  Arrows point to the bottom straps.


6. Here's a picture of the installed racks with arrows to all the straps. Be sure to tighten them.


The top brace gently resting on the glass.

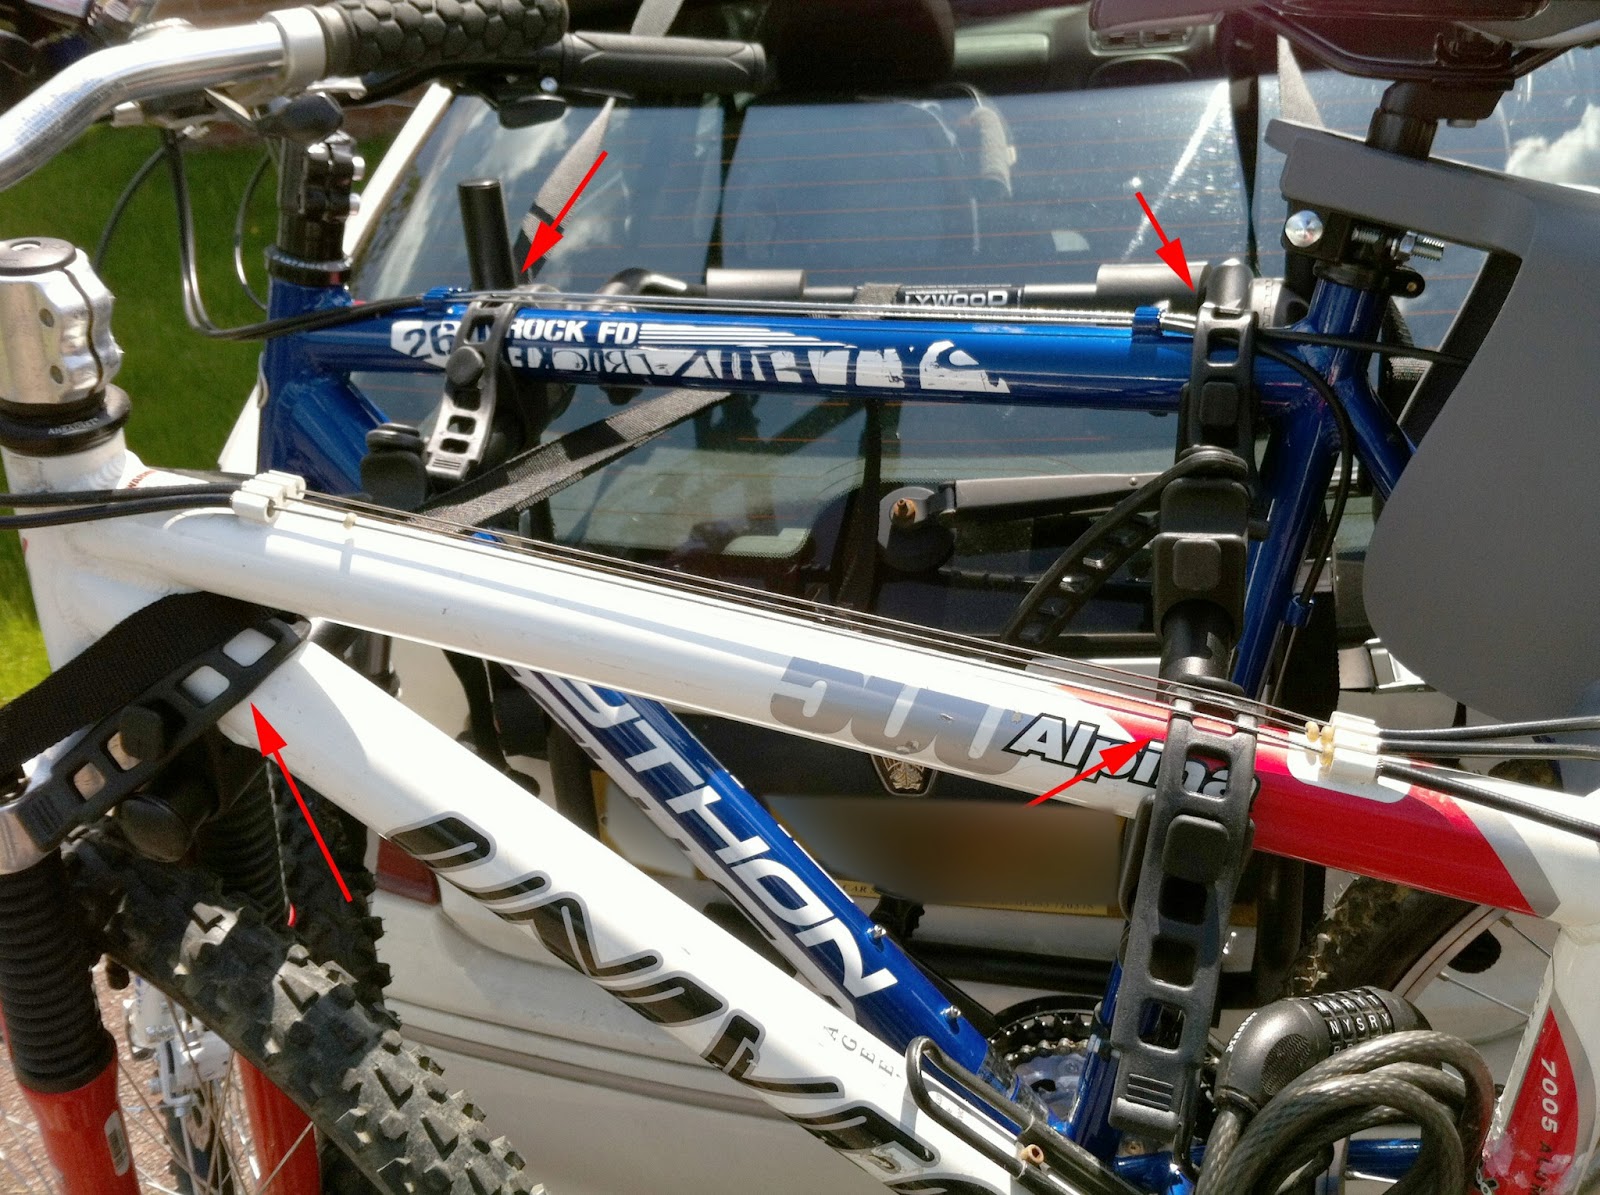
7. Attaching the bikes. As stated in the manual, be sure to load the heaviest bike first. I used the rubber straps to strap over the top tube of the first bike. Be sure to not route the straps over cables.


Loading the second bike. This is a woman's mountain bike so the right strap went over the top tube and the left strap went over the bottom tube.


Arrows to all the straps.  Note the bottom tube on the woman's mountain bike strapped to keep the bike level. Be sure to retighten after all the bikes are loaded.

After the bikes were strapped in, there's a final nylon strap that the manual says to wrap around all the bikes. I weaved it through the front wheels of both bikes and pulled to keep the front forks/wheels from moving during transit. Here's what the car looks like fully loaded. The child seat I'm using on the mountain bike is a Bell 500 Cocoon carrier. 

View from the rear view mirror. I was afraid I wasn't going to be able to see over the bikes, but I was wrong! Great visibility!

That's it.  We've really enjoyed the ease of use with the carrier. Reviews have mentioned that the straps get loose after 50 or so miles of driving and people are afraid that the bikes will rattle off on the highway. We've had no such experience with the straps loosening. I'd probably check a couple of times on a long road trip though, just to make sure. Removing the carrier is also super easy as well. I hope you fellow rover 200/rover 25/rover 220/bubble type rovers can use this info.


Cheers.